
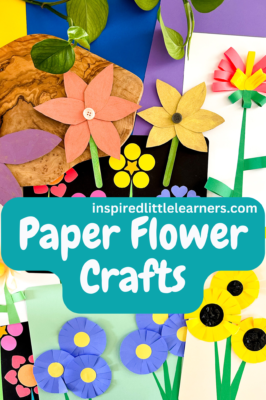
Four Paper Flower Crafts.
Starting around the age of 4, my kids became VERY interested in making crafts! I love paper crafts, because they are generally simple enough for young kids and don’t require a lot of materials. For most of these crafts, you will need colorful paper to create the flowers and the other materials could easily be substituted. For example, you can use scissors to cut out shapes if you don’t have the paper punchers. For the last craft in the list, we used recycled cardboard instead of paper, but you could easily use paper instead!
When crafting with kids, remember that the process is more important than the product. Let kids get creative with how they create their art! I usually show an example of the craft, provide the materials, and then let them create the art how they want to! I always love to see their creativity at work and how their finished artwork turns out!
This post may contain affiliate links. As an Amazon Associate and participant in other affiliate programs, I earn a small commission on qualifying purchases (at no additional cost to you). Thank you for your support! Read our disclosure policy here.
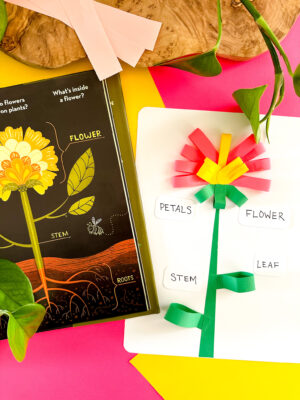
Paper Loop Flowers
Materials:
Colorful paper
White cardstock
Glue
Scissors
Pom-poms
Paper cutter (optional)
Steps:
1. Cut strips of colorful paper approximately 0.5 inch wide and 3 inches long. I use a paper cutter for straight lines, but you can also free cut the strips.
2. Create loops by gluing the two ends of a paper strip together. I find that a glue stick works well for this.
3. Once you have your loops, glue them onto cardstock to form the shape of a flower (see photo). You want to glue only the end of the loop down; the rest of the loop will not be glued making the flowers appear 3D.
4. Cut a stem out of green paper and make green loops for the flower’s leaves. Glue onto the paper.
5. Use a pom-pom for the flower’s center. White glue works best for gluing down the pom-pom.
Colorful Flower Art Using Paper Punchers

Materials:
Colorful paper
Black cardstock
Paper punchers*
Glue stick
Scissors
Steps:
1. Use paper punchers to punch various shapes out of colorful paper. We used a variety of shapes. including circles, stars, and hearts.
2. Arrange the shapes onto cardstock to form flowers. We used black cardstock because the colors really pop against the dark background, but you could also use white cardstock. Be creative with this step and let your child design their own flowers.
3. Use a glue stick to glue the shapes onto the cardstock.
4. Using green paper, cut and glue long thin strips for the flower stems.
5. Using the same green paper, use the paper punch to create the flower’s leaves.
*If you don’t have paper punchers, you could use dot stickers instead!
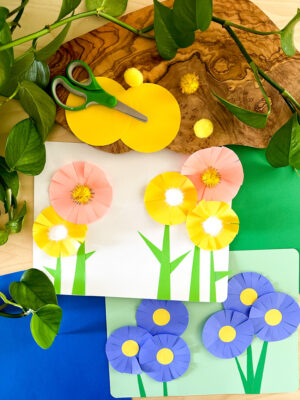
Create Flowers from Paper Circles
Materials:
Colorful paper
Large circle paper puncher
Small circle paper puncher
Pom-poms (optional)
Glue
Scissors
Steps:
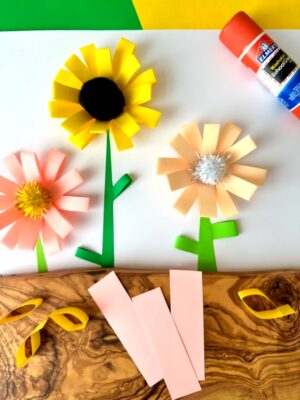
1. Using a large paper puncher, cut circles out of colorful paper. We used a 3″ circle paper puncher. (If you don’t have a paper puncher, you could trace something circular like a cup and cut out the circles!)
2. Cut small slits in the paper towards the circle’s center without going into the center. These will form the flower petals!
3. Place glue on the backside of the flower in the center of the circle and place on a piece of paper. Cardstock works well for this. When you glue the flowers in this way, the petals are not glued down. You can gently bend the petals to make the flower 3D.
4. Cut strips of green paper to make the stems and leaves. Glue these onto the paper.
5. To make the flower center, you can use a smaller paper circle, a pom-pom or a button. Glue one of these into the center of the flower!

Simple Flowers from Recycled Cardboard

Materials:
Cardboard
Paint sticks
Buttons
Craft sticks
Scissors
Glue
Steps:
1. Cut petal shapes out of cardboard. Thinner cardboard is easiest to cut with scissors. For example, a cereal or cracker box would work perfectly! I cut one petal freehand and then used it to trace the other petals for the flower.
2. Use paint sticks to color the flower petals. We LOVE paint sticks because they are easy to use and only take a minute to dry! We used pastel paint sticks for this craft.
3. Use glue to glue the flower petals together by placing glue on one end of each petal. We used white glue (easier for kids to use), but hot glue would also work well!
4. Use a green paint stick to color the craft sticks to use as flower stems.
5. Use glue (white glue or hot glue) to add the stem to the flower.
6. Glue buttons as the flower’s center!