Artist Study: Yayoi Kusama.

This past week, my kids and I had fun learning more about the artist Yayoi Kusama, who is sometimes called the “Queen of Polka Dots”. We started by reading the book “Yayoi Kusama: From Here to Infinity” by Sarah Suzuki and Ellen Weinstein. Then, throughout the week we did three art activities inspired by Yayoi Kusama’s art. The pumpkin and mushroom themes made it a fun artist to learn more about during the fall, but you could do a similar artist study anytime time of year! My kids (ages 6, 5, and 3 years old) had so much fun with this artist study that I am sure we will do more Kusama-inspired art in the future!
This post may contain affiliate links. As an Amazon Associate and participant in other affiliate programs, I earn a small commission on qualifying purchases (at no additional cost to you). Thank you for your support! Read our disclosure policy here.
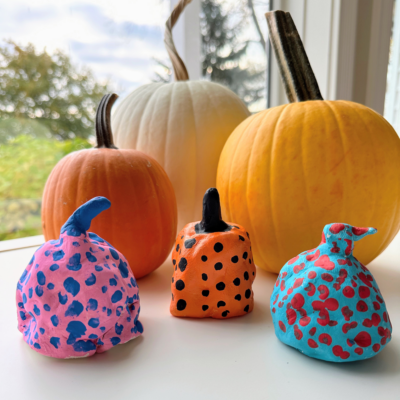
Air-Dry Clay Pumpkins

Materials:
Air dry clay (white)
Paper
Paint (tempera or acrylic)
Paint brush
To Make:
We used recycled packing paper and crumpled it into a ball. Roll a thin layer of air dry clay and wrap the clay layer around the crumbled paper. Create a stem out of air dry clay and attach to the pumpkin (you may need to add water to the stem for it to attach). Let the clay fully dry (this may take a few days). Once dry, paint the pumpkin a single color and let the paint dry. Once dry, select a second color of paint and use a Q-Tip or small paint brush to paint dots on the pumpkin. Let dry and display your pumpkin!
The idea for our clay pumpkin came from the book “Mini Masterpieces: Exploring art history with hands-on projects for kids” by Laura Lohmann
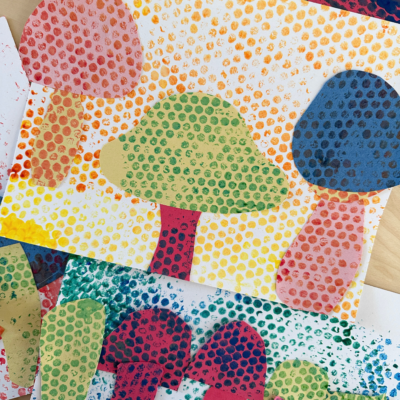
Bubble Wrap Printed Mushrooms

Materials:
Bubble wrap
Paint
Paint brush
Construction paper
Scissors
Glue
To Make:
Lay your bubble wrap “bubble” side up. (We placed ours in a tray for easier cleanup.) Use 2-3 colors of paint and paint the bubble wrap. (I recommend using colors next to each other on the color wheel.) After painting the bubble wrap, lay a sheet of construction paper on top of the paint and gently press down to “stamp” the dots onto the paper. Paint colored construction paper using this technique (these will be used for the mushrooms) and paint white paper with this technique (this will be the background for your art). Use a few sheets of bubble wrap and different colors of paint to create dot prints in different colors.
Once the paint is dry, cut mushroom tops and mushroom bottoms out of the colored construction paper (for each mushroom, use one color for the top and another color for the bottom). Glue onto your background paper. Have fun!
This art activity was also inspired by an idea in the book “Mini Masterpieces: Exploring art history with hands-on projects for kids” by Laura Lohmann, although we created our mushrooms differently than the art project detailed in the book.
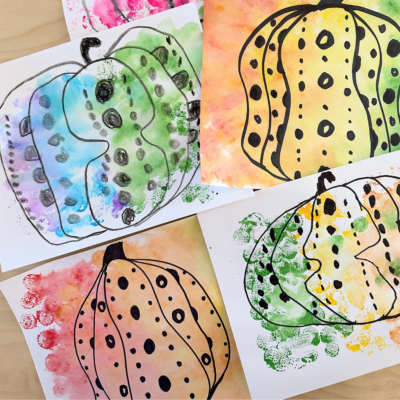
Colorful Pumpkins using Dot Markers

Materials:
Cardstock
Washable dot markers
Permanent marker
Spray bottle with water
Plastic tray
To Make:
Using a permanent marker (or a wax-based black crayon), draw a simple pumpkin using curved lines onto the cardstock. Fill in the lines with dots in the style of Yayoi Kusama. Using the dot markers, color onto the tray. (Instead of a plastic tray, you can also use a sheet of aluminum foil, but I like that a tray does not create excess waste.) Lightly spray the colors with water using a spray bottle. Lay your sheet of paper (pumpkin side down) onto the colors and press firmly. Gently lift to admire your artwork! Have fun!
